Saturday, March 29, 2008

Culling - Spot The Difference

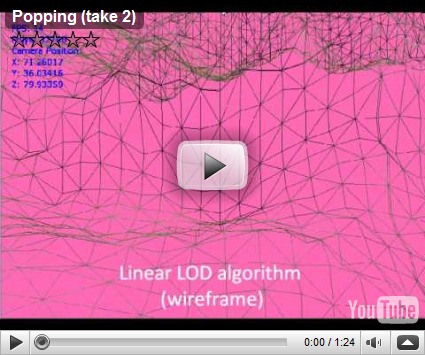
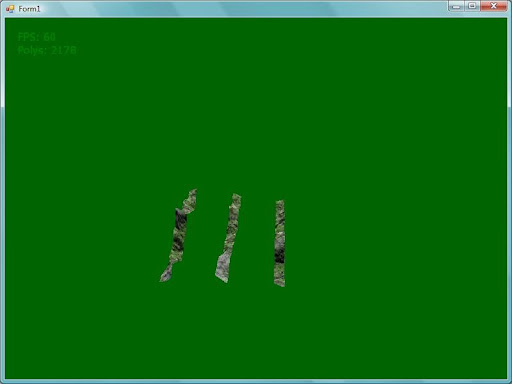
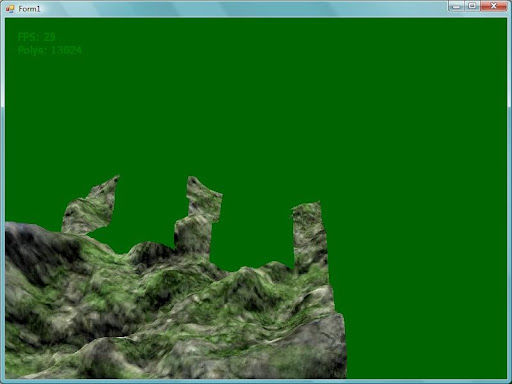
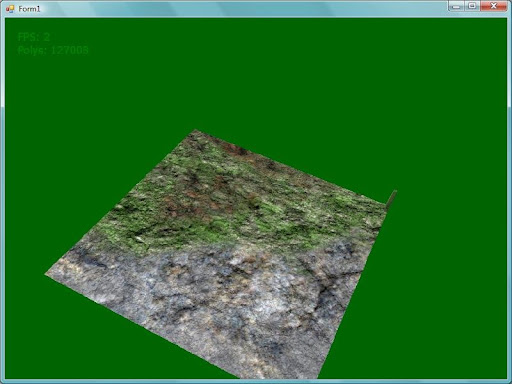
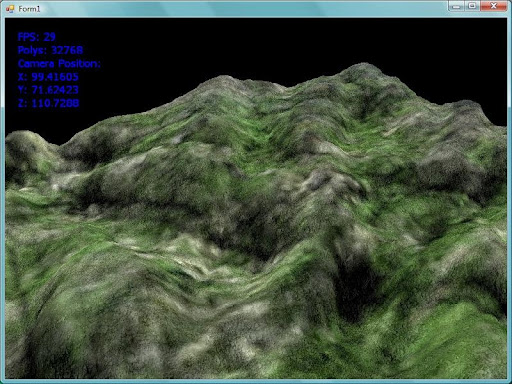
I've implemented frustum culling on my terrain, patches that are off-camera won't be rendered. I followed Chad Vernon's tutorial here, it was a very good straightforward tutorial (with source in C#). I'd like to have tutorials like his but I think people (like Chad) can explain things a lot better than I can so I'll leave it to the pros. Anyways, with frustum culling if you were on the terrain looking one direction, everything behind you won't be seen so don't render it. Here are the before and after images, see if you can spot the difference:

culloff cullon

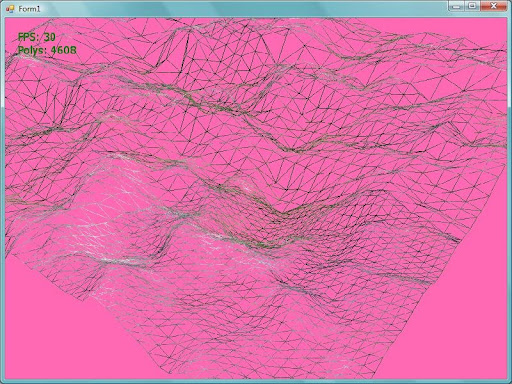
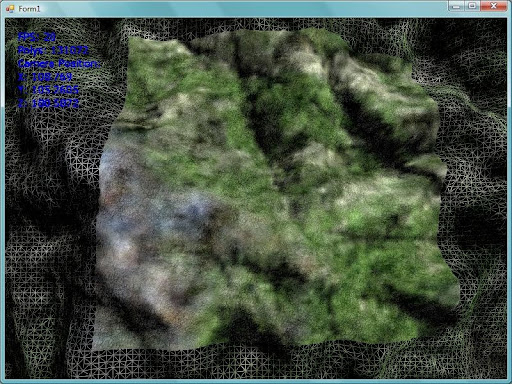
Yeah... the difficult part of showing something that's off-screen is that it's off-screen. In the next shot, I've exaggerated the frustum culling, and instead of culling I'm just rendering the patches in wire frame. So you can see the centre patch is shown and the neighbouring ones are culled.

cullwire

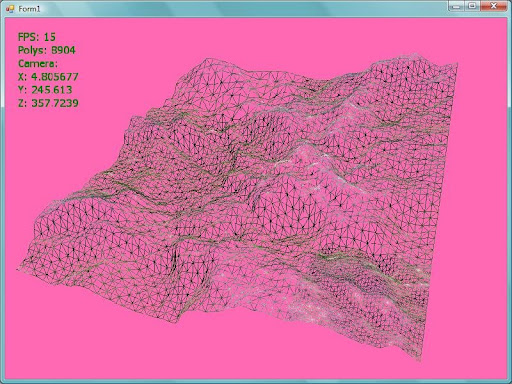
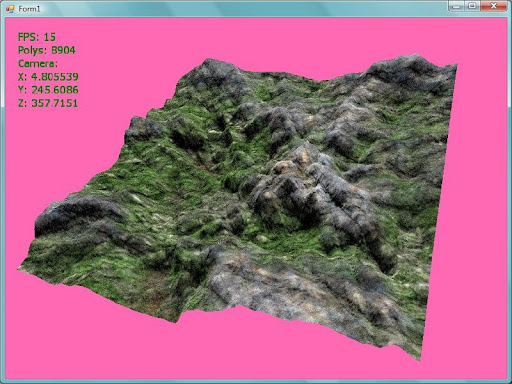
It's a huge improvement on the number of polys rendered (and this of course increases the FPS) but I'm sure I'll have to do a few more tricks when I get around to rendering planets. Like for example, fill each solar system with a dense dense fog so you can only see 5 metres in front of you.

Popping

I tried geo-morphing on the terrain, but it didn't seem to have any effect really, popping was still quite visible - so instead I changed the way I calculate the LOD to be non-linear. All this means that instead of changing LOD at 100, 200, 300, 400 etc., it changes in relation to how far away it is like 200, 400, 800, 1600. Popping isn't noticeable at all now.

The video is in 4 parts, with a little of the old in-out:

  • Linear LOD
  • Non-linear LOD
  • Linear LOD line rendering
  • Non-linear line rendering

The change is most visible in the last section, you can see that the LOD only changes when the vertices are about a pixel apart.  The downside is that it's fairly poly intensive if you're rendering a large patch of terrain - so I might have to make a few compromises when it comes to doing planets.

It's my first time uploading a video so hopefully the above shows my terrain stuff and not some whiney emo.

Update: video quality was awful so now I know how to do it, I’ve uploaded take 2.

Monday, March 24, 2008

Cracks Painted Over

I had to redo the algorithm for creating the index buffer for a patch again but finally the patches don't show cracks anymore. If a neighbouring patch is at a lower level of detail, I draw the edge that borders that patch a little coarser by omitting a vertex. In the image below left, the red circle indicates where a crack occurs. By omitting the vertex from the higher detailed patch, the poly on the right of the left patch and the poly on the left of the right patch - share an edge. The other image shows where this happens on my engine.

removevertexfixcrack fixedcracks

The results aren't very stunning, just the terrain with no cracks:

clodnocracks clodnocrackstextured

One bad side effect of this is that recreating the index buffer each time is a big performance hit. I might pre-calculate all the kinds of index buffers (one set for each level of detail - a set has 16 versions for every configuration that deals with every combination of neighbouring level of details) and share them between the patches. I'm not that bothered about performance at the moment though, I'll just rely on whenever quantum computing comes around to speed my engine up.

When going towards or away from the terrain, it pops a lot as it changes from one level of detail to the next - so I might look into geomorphing to minimise popping. I think I could come up with a better way of calculating the level of detail too (non-linearly). Or... go back to brute force terrain and wait for quantum computing...

Sunday, March 23, 2008

CLOD - Builder's Crack

Why put off something off until tomorrow when you can do it the day after that? I finally got around to doing Continuous Level Of Detail (CLOD), it was really frustrating trying to debug and I had a few restarts on the algorithm because it got so messed up (very handy rolling back with tortoiseSVN, SVN (best source control programs I've used) and unfuddle's free service).  Check out some of the mistakes along the way:

clodstrip1 clodstrip2 CLODv3

Here's what it looked like when I finally got it working. I've exaggerated when the level of detail changes just so the difference in polygons is obvious. Patches that are close to the camera (bottom right) are more detailed (showing more polygons) than patches farther from the camera (top left)... Shouldn't it be called Non-continuous Level Of Detail?

CLODworking

So why did I choose a pink background?  Well if you've been following fashion, you'll know that pink is the new black - this really held me up as I had to write a custom Color class which would swap colours around dependent on current trends. A handy side effect though is that it shows up the cracks that can occur using CLOD like the one on the top right:

CLODcracked

The cracks occur when 2 patches of different detail levels are beside each other, the more detailed patch has a vertex on the patch border where the less detailed patch doesn't. I'll have to increase the level of detail on any edge of a patch that borders a higher detail neighbour in order to *patch* up the cracks - get it??  See what I did there???

Thursday, March 20, 2008

Seasons

I'm still avoiding CLOD, but the distraction I came up with was kinda cool so I thought I'd share. It occurred to me that I could create a neat seasonal effect if I play with the terrain texturing. Terrain texturing is a single texture made from a blend of base textures, the blend depends on the height of the terrain at a certain point and the height range for each base texture. Well, if we were to multiply each height by a factor when we're working out what texture to use so that the heights appeared to be bigger than usual, then we'd get a lot more snowy texture on the terrain (and vice versa for grass). I had to include a couple of extreme cases in the existing code (like if the height is higher than the max range of the snow texture, just make it snow) but it was simple to add the seasonal factor. Here's what the effect produced:

season1 season2 season3 season4 season5 season6

It's nice to watch the snow creep in over time, but it really slows the frame rate right down (to about 2 fps). I worked with Bitmaps in C# before and it seems to be about 100 times faster to lock the pixels and access them directly rather than use GetPixel and SetPixel. I'm also sure there are fancy hardware things you could do too.


If I keep up these distractions, the real-world season is likely to change before I get on with CLOD. Well, except here, it seems to be cold and rainy season indefinitely.

Light Mapping

Ok, so I'm putting CLOD on hold for a bit, I'm not looking forward to be honest given I've pretty much forgotten everything to do with geometry. So instead I implemented light mapping. Light mapping is just darkening pixels on the terrain so it looks like a light is casting shadows. The simplest and most visually attractive technique in my opinion is slope lighting. Following a line of pixels in a direction from where the light source should be (in this case I chose south (which is x = 0, z = -1)), make the current pixel darker than the previous by a factor of how much higher the previous height is. If the previous pixel is lower than the current pixel, don't darken it.

shade = 1.0f - ((heightMap[x - xLightDir, z - zLightDir] - heightMap[x, z]) / softness);

As always you can play about with parameters to make the light come from a different direction, or to create a more severe (darker) shadow. Here's how the effect looks in practice on my engine (before and after):


nonlightmapped lightmapped


It's not proper shadowing but I like the effect. I think it could be extended to stretch the shadows - for example a low sun would create long shadows, so you probably could choose a direction as above with a shadow range of 10 (something like x = 0, z = -10). However sections of the edges would look a bit out of place because they don't have 10 pixels before them.


For a realistic Irish effect you don't need shadows at all because there's no direct light source, just make sure to turn the colour of your ambient light to dark grey.

Adding Detail Map - Looks Fuzzy

To counteract the blurriness of the terrain, I'll apply a detail map. A detail map is just a plain texture with some details like cracks and bumps. The detail map will be applied 32 times over the terrain, here's what the result looks like (before and after):

closenotfuzzy closefuzzy

It looks a bit more realistic, but it seems to be really noisy and fuzzy when I fly towards it (that is when I fly using the camera controls, not in real life - I didn't take any crystal meth or anything). Here's what it looks like from far away (before and after):

notfuzzy fuzzy3

It's easiest to see the fuzzy noise on the black pit to the right. It's hard to tell from the images but it's worst when you move toward the terrain; pixels on the detail map seem to move about and make it look something like there's interference on a TV channel. When I release my game I'll just include a superficial aerial with it - problem solved.

A lot of these sort of problems can be fixed with manipulating some of the parameters (like how many times the detail map is repeated over the terrain). There are already tons of parameters I've arbitrarily picked and I just run the project to see what it looks like, then change them again - which takes up a bit of time. I'm thinking of writing some sort of Reflection-based ParameterManager class so I can easily cycle through all available parameters at run-time and save/load sets. I'll put that on the back-burner though because my terrain performs horribly at the moment so I'll do some optimisation with Continuous Level Of Detail (CLOD) next time.

Terrain Texturing

After I put in the camera rotation code from my last post, the teeth-like artifacts disappeared. I find graphical programs a real bitch to debug so I'm pretty happy to totally block from memory that they ever existed... what was I talking about? Oh yeah, texturing the terrain.

Instead of colouring the vertex based on how high it is, we'll texture it. With height-colouring it was simple to go from black to white, it's just as easy going from one texture to another - the technique is pretty much the same but the start and end colours are retrieved from a specific point on each texture. Blending is done as before, if the point is nearer the higher texture, the point will be closer in colour to the pixel from the higher texture and vice versa for the lower texture. Here's the result of applying 4 textures (earth, grass, rock and snow) to my terrain:

0 1 2 3

texturedterrain

It looks more realistic, but a little bit blurry. The pit on the right looks black instead of earthy because I started blending off with a black colour as a base, I think it looks ok.

Wednesday, March 19, 2008

Proper Camera Rotation

In order to have a better look at the weird artefacts on my terrain, I tried to add a mouse & keyboard controlled camera. Matrix.RotationYawPitchRoll doesn't seem to work for me - if I rotate my camera 90 degrees about the Y axis (yaw) looking to my left then try to rotate about the Z axis (roll) so the view spins clockwise it actually rotates around the X axis (pitch) and ends up looking up and down.

(I suppose I should've said on the first post that I'm writing the game in Managed DirectX with C#).

Anyways, I had this problem before when I was good at geometry so I was sure I could do it again. Unfortunately years of boozing have destroyed any remnants of my secondary school geometry and the results of my sin/cos calculations were that I should go get my old computer out of the shed and get the old code. Here it is if anyone has the same problem:

private void Rotate(float yaw, float pitch, float roll)
{
// We'll create 3 matrices for the combined rotation
Matrix yawMatrix = new Matrix ();
Matrix pitchMatrix = new Matrix ();
Matrix rollMatrix = new Matrix ();

_localMatrix.Translate(_position);

// Reset it's orientation vectors to make sure they're all
// sqare against each other and unit length
_look.Normalize();
_right = Vector3.Cross(_up, _look);
_right.Normalize();
_up = Vector3.Cross(_look, _right);
_up.Normalize();

// The pitch rotation will be done about the x axis (right)
pitchMatrix.RotateAxis(_right, pitch);
// The yaw rotation will be done about the y axis (up)
yawMatrix.RotateAxis(_up, yaw);
// The roll rotation will be done about the z axis (look)
rollMatrix.RotateAxis(_look, roll);

// Rotate the local axis about these matrices so we can tell
// how the object is now oriented after rotation

// Rotate the _look and _right about the yaw rotation
_look.TransformCoordinate(yawMatrix);
_right.TransformCoordinate(yawMatrix);

// Rotate the _up and _right about the roll rotation
_up.TransformCoordinate(rollMatrix);
_right.TransformCoordinate(rollMatrix);

// Rotate the _look and _up about the pitch rotation
_look.TransformCoordinate(pitchMatrix);
_up.TransformCoordinate(pitchMatrix);

// Store this in the local matrix for translation when rendering
_localMatrix.M11 = _right.X;
_localMatrix.M12 = _right.Y;
_localMatrix.M13 = _right.Z;

_localMatrix.M21 = _up.X;
_localMatrix.M22 = _up.Y;
_localMatrix.M23 = _up.Z;

_localMatrix.M31 = _look.X;
_localMatrix.M32 = _look.Y;
_localMatrix.M33 = _look.Z;
}

First post!!!!!

Hello! I'm writing this blog for purely selfish reasons - I've wanted to program games since I was a kid but have only once finished a project: a Nibbles clone with death sequences in DOS (I'll put up the exe if anyone's interested). A friend suggested that a blog can help so hopefully some sort of guilt for updating this blog will override my incredible laziness. He's got a game engine in development too and has made a lot of progress, it looks fantastic and you can see it on his blog - feel free to make me feel better and undermine him and his engine :)

So what'll my game be then? I don't know yet, but my ambitions are high - basically I'd like a procedurally created universe with super-intelligent AI with a combined RPG/FPS/Flight/Driving/Adventure gameplay that's fecking awesome. People will become addicted to my game and it will create world peace. Oh and I'll get the ride off of some hot groupies. But I've got to start somewhere, so here we go - a terrain (bit of land) generated with fault formation (raise sections of the land randomly) and lit with height lighting (the higher the whiter). These are real terrain basics so I won't go into detail (unless someone needs it).


Looks ok for a first go, but there are these weird artefacts, kinda like teeth, no idea what they are...
Until next time!